
Azure dashboard url settings
Happy New year! With a new year I decided to move my blog to my own hosting instead of using the wordpress.com. I figured that since I have a nice domain and some hosting on azure, why not take advantage of it? In doing so, I figured this could be a great piece of knowledge, for those people who are also hosting on wordpress.com and would like to self host.
Now Let’s get to the beef.
I’ll go over how to setup a wordpress site on azure and forward a custom domain to it in this tutorial. The reason I’m using azure as
- It’s super simple to do a self-host
- You can use many other features in azure if you’d like to
- I work for Microsoft : ) and azure is quite a cheep option.
I’ll be using azure websites for this as it provides the easiest maintenance and setup option. Setting up the server literally will take me a few clicks, it will also be very cheap (free if you have some bizspark credits hanging around)
- First step is to head over to the azure portal login with your existing account or create a new one.
- Once you’ve done that you can hit the plus sign on the bottom and create a new website. Azure is kind enough to offer a template for wordpress sites so this will be quick.

start by creating a new website service from gallery
- In the next menu that pops up you’ll choose blogs and scroll down on the list to WordPress.

- I’m now naming by demo site atilev which would put it at http://atilev.azurewebsites.net.

- You will be prompted to create a database. Since WordPress uses MySQL you’ll have to use clear dB. This will happen automatically for you. You all you need is to choose the name from the dropdown.
- Go ahead and hit create, check the box on the bottom of the last page saying you agree to ClearDB’s terms and you’re good to go. Once the website should be up shortly and you can go to http://<youwodrpesssitename>.azurewebsites.net and start the setup. You should be seeing a screen like this that will be asking you to create a username and password for your worddpress site.
- If you’re not you’ve done something wrong. Go back.
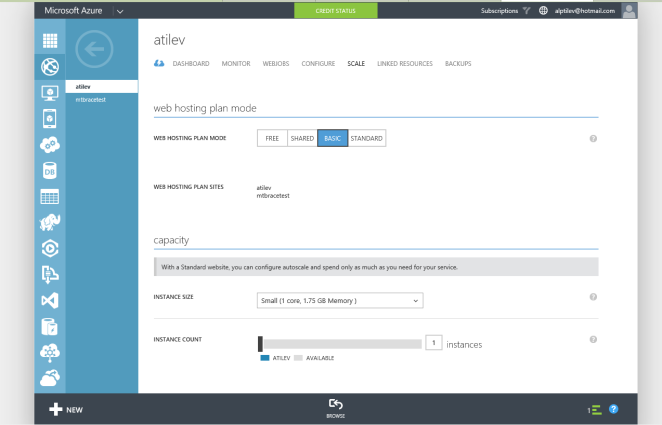
- To setup a custom domain for you wordpress site you’re going to need a few things. First you can’t use the FREE tier of azure websites so you’ll have to upgrade to the standard or basic tier. You can do this by going to your deployment and going to the Scale page. The small instance works fine for me as it keeps my costs down. If you have a lot of traffic you might want to increase this.
- After this you can navigate to the configuration tab and scroll down until you find the domain names section When you click on “manage domains” you’ll be provided instructions on a few ways you can verify that you own the domain. At this point you’ll need to log into your domain provide like godaddy.com or namecheap and add a CNAME record that points your domain to the azure website. Keep in mind this took around an hour for me so take a coffee break after you put in the CNAME record. You can only enter in your domain name on the azure portal once azure is able to verify it.
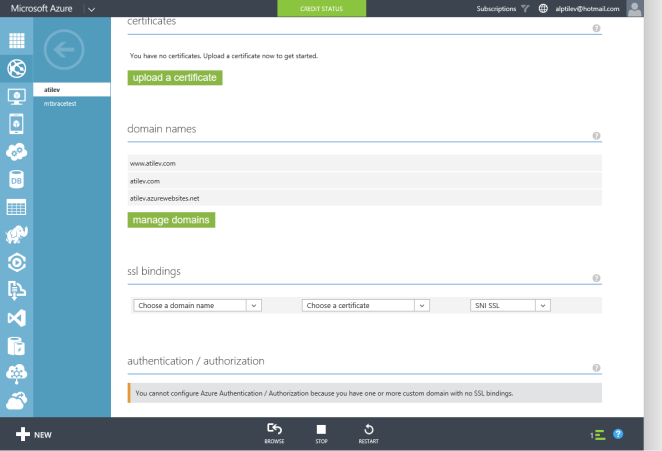
Azure dashboard custom URL settings

Godaddy CNAME record settings
- Once you’ve verified that your domain is now resolving azure service you can go ahead and add it.
- One last thing now you can log in to the admin portal of your WordPress site by going to http://www.yourdomain.com/wp-admin
- Simply login the credentials you setup in step 6. Once you’re in you should be seeing your admin panel Here you’ll need to set things up but first go to the settings page and click on general settings. You’ll need to put in the address for your website so that WordPress can display the proper urls when navigation occurs. Here how my setup looks:

WordPress settings


With this final step, you should be done! Blog and post the night away. If you have any questions feel free to post the in the comments. You’ll see that my posts are a bit stale currently on atilev.com but that should change soon.
Alp
